Welcome to another Hack The Box exercise. Today, we will try and pwn the PermX machine on Hack The Box. If you are new to this blog, please do not forget to like, comment and subscribe to my YouTube channel and follow me on LinkedIn for more updates.
About the machine
PermX is an easy difficulty Linux machine on HackTheBox (HTB) that involves concepts such as RCE in an LMS, credential hunting, and exploiting a misconfigured script. The machine's write-ups detail the exploitation of a Chamilo LMS web application to gain root access. PermX is a Linux machine featuring a learning management system vulnerable to unrestricted file uploads via CVE-2023-4220. This vulnerability is leveraged to gain a foothold on the machine. Enumerating the machine reveals credentials that lead to SSH access. A sudo misconfiguration is then exploited to gain a root shell.
The first step in pwning this machine is to connect the Kali Linux machine with the Hack the Box server. To do this, I logged in to my HTB account and click “Connect to HTB.” I chose the EU server and click on the “Download VPN” button.
Once the download has been completed (.ovpn file), I moved it into the new folder I have just created on my desktop called "PermxHTB.”. Once the file has been moved/copied, I opened the directory in my terminal by right-clicking and chose the option “Open in terminal.” Once my terminal has been opened, I typed the following commands to establish a connection between my Kali Linux terminal and Hack The Box server:
Once the connection has been successfully established, “Connect to HTB” button turned green and shows the number of active connections. Next, I clicked on “machines” and choose “PermX”, then clicked on “Join machine” to start the machine. The machine was assigned an IP address of 10.10.11.23.
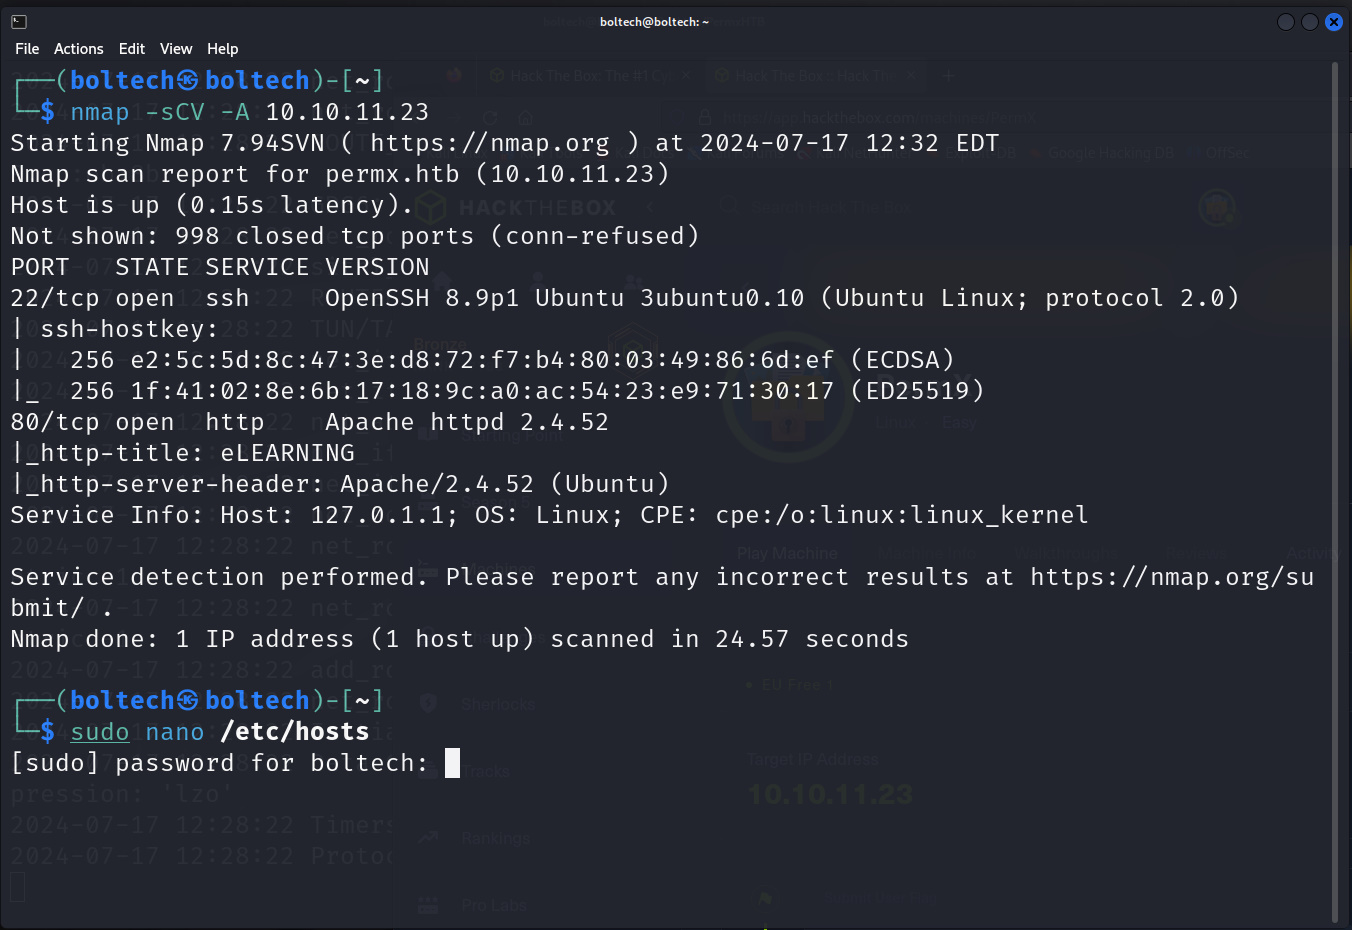
Afterwards, I performed enumeration using Nmap by typing the following command in my terminal.
This scanned all the ports available on the target machine (10.10.11.23) and provide a detailed report on each of the ports.
I found two open ports on the target machine (port 22/tcp and port 80/tcp). On port 80, it can be seen that the port is a web application because it uses http-title and we can also see that the platform is an E-learning website.
The next step was adding the target IP address and URL domain name to the /etc/host folder. To add the IP address, I typed the following command in my terminal.
This launched the GNU interface allowing me to add the IP address and URL domain name. After this has been successfully added, I performed a subdomain enumeration using ffuf which showed other URL subdomain that may be associated with the target system. I ran the following commands in my terminal afterwards:
I found two subdomains
- www
- lms
Which I will add these to my vhost file using the following command:
Then I added the following in the /etc/hosts file:
Then I opened my FireFox browser and visited lms.permx.htb
Upon visiting the website, I found out the website has a login screen with a username and password text input field. I tried using common default username and password but none works! So, I tried to find another way to solve this.
I started looking for vulnerabilities associated with Chamilo application by looking it up on Google and ExploitDB. I came across a GitHub repository with PoC to gain unauthenticated reverse shell on websites running Chamilo.
I downloaded this exploit by clicking on “Code” and then on “Download ZIP”. Once the zip file has been downloaded, I unzipped it by running the following code:
This unzipped the file and I navigated into the directory. Afterwards, I downloaded a reverse shell php file on pentest monkey to gain a reverse shell.
Inside the extracted CVE-2023–4220 folder, I right-clicked and chose the option “open in terminal” and this launched the terminal. Inside the terminal, I ran the following commands to give admin privilege to run/execute the CVE-2023–4220.sh file:
Once this has been completed, I uploaded the reverse shell file on lms.permx.htb by running the following command:
To stabilize the connection, I ran the following commands in the terminal:
Then I opened the configuration.php file by running the following command in the terminal:


0 Comments