I just solved Runner from Hack the Box!
Runner Machine Summary
Runner is a medium difficulty Linux box that contains a vulnerability CVE-2023-42793 in TeamCity. This vulnerability allows users to bypass authentication and extract an API token, which can be used to enable debug features for executing system commands. By gaining access to a TeamCity docker container and compressing the HSQLDB database files, we can extract credentials for the user matthew and find an SSH key for john. After cracking the password, we can authenticate on the host filesystem. Upon inspecting the /etc/hosts file, we discover a running Portainer instance. Using `matthews` credentials, we access the subdomain externally. While authenticated, we find that we can create images, but our privileges are limited. After checking the version of runc on the host, we exploit a vulnerability CVE-2024-21626 through the image build function of Portainer, which allows us to create a SUID bash file on the host.
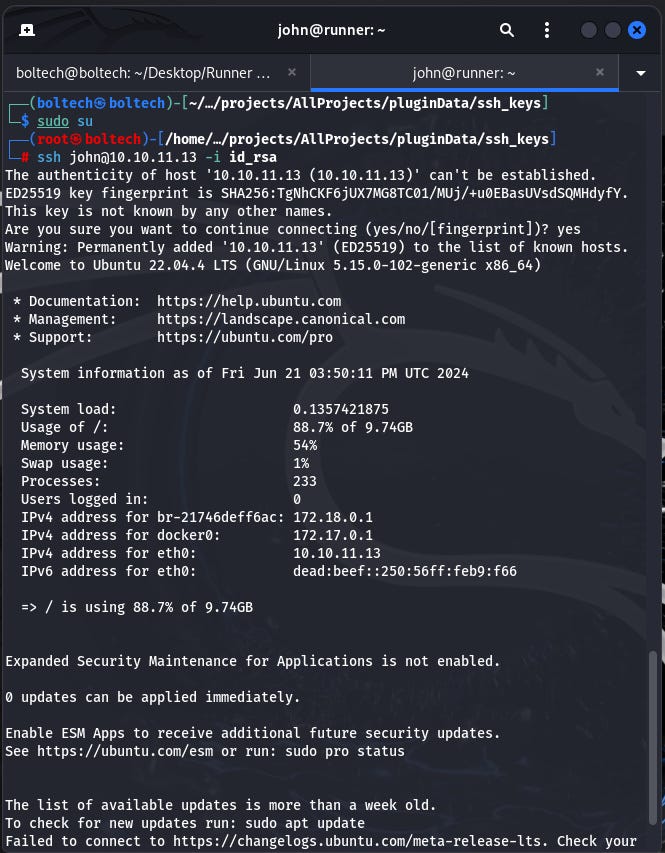
The first step in solving this machine was connecting my Kali Linux terminal to Hack the Box server. I logged into my Hack the Box account inside my Firefox browser on my Kali Linux. After I have successfully logged in, I downloaded the OpenVPN file and rename it to lab.ovpn and copy it into the “Runner HTB” folder on my desktop. Then, I launched my terminal and run the following command to connect my Kali Linux to the Hack the Box server:
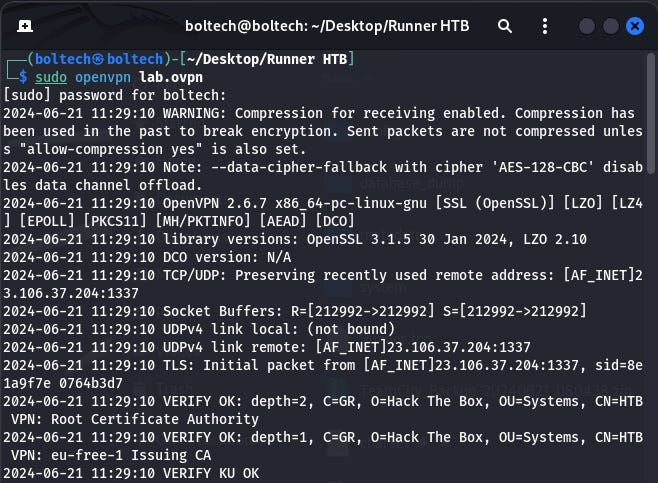
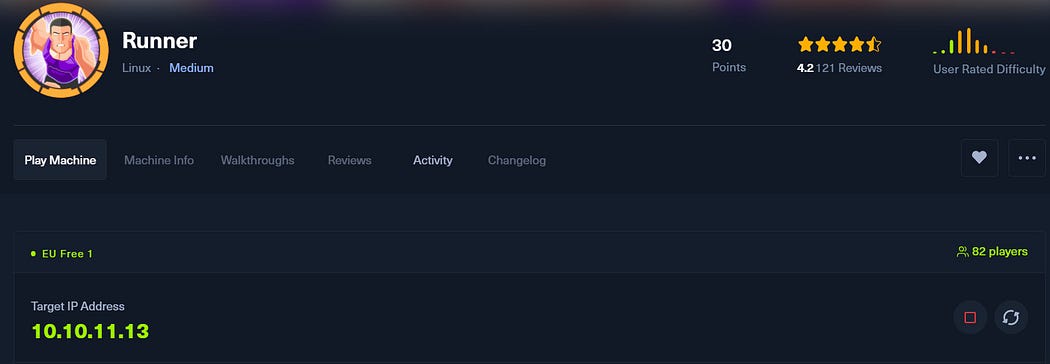
This will establish a connection between my Kali Linux and hack the box platform openvpn. Once this connection has been successfully setup, I started the Runner machine, and I was assigned an IP address of 10.10.11.13.
The second step in solving this machine is to perform enumeration using nmap. I am going to launch my terminal on my Kali Linux and type the following commands. There are several ways to scan for open ports using nmap. We can use any of the commands to find the ports that are opened by connecting to the Runner machine IP address.
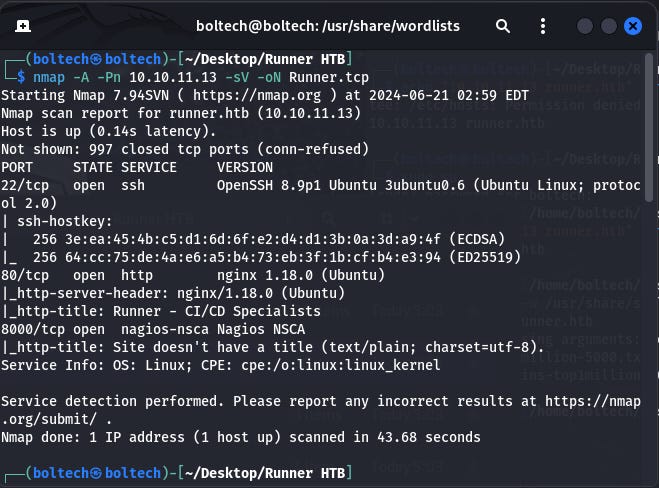
I found three open ports after scanning with nmap. The ports are 22/tcp, 80/tcp and 8000/tcp.
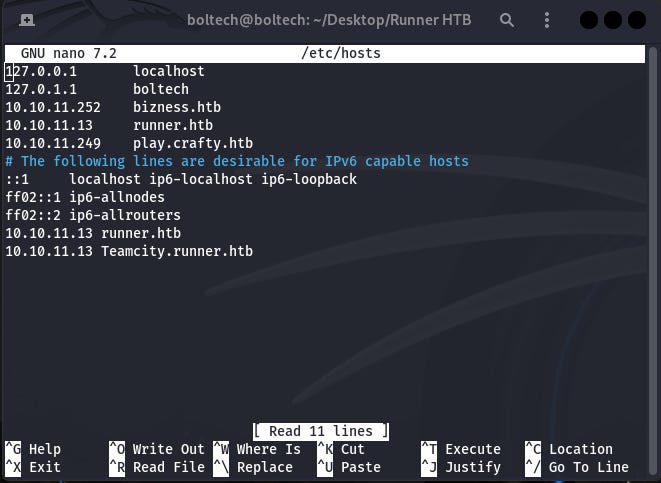
The next step is adding runner.htb to the /etc/hosts folder. There are two ways you can go about this. One is using:
If this doesn’t work, you can add sudo in front of the echo command to become something like this:
Afterwards I performed a directory scan using the following command:
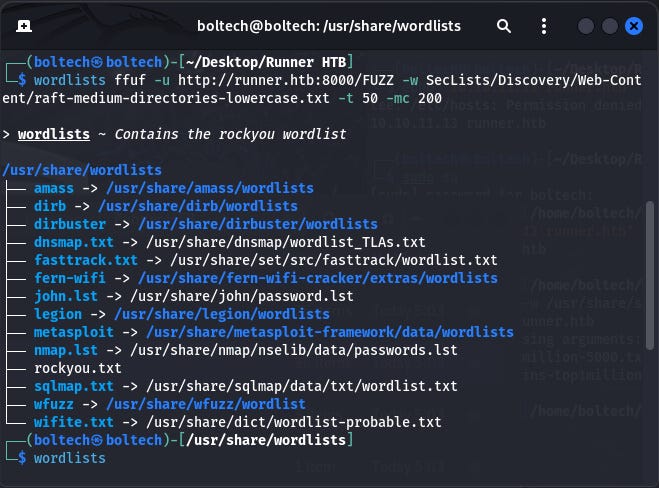
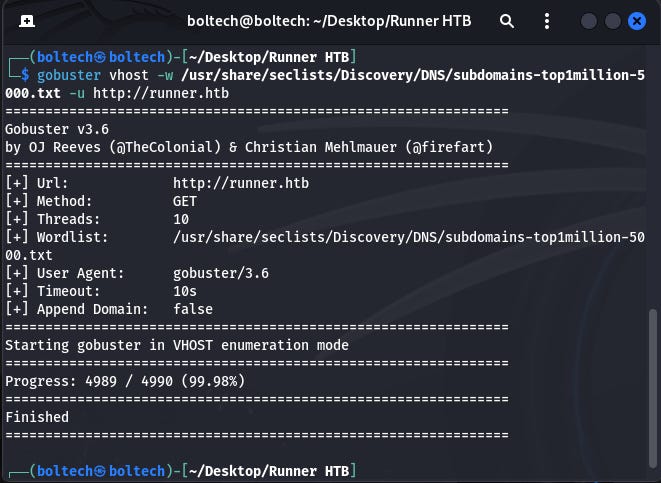
Unfortunately, I couldn’t find anything useful in the directories. So, I tried virtual host blasting by running the following command:
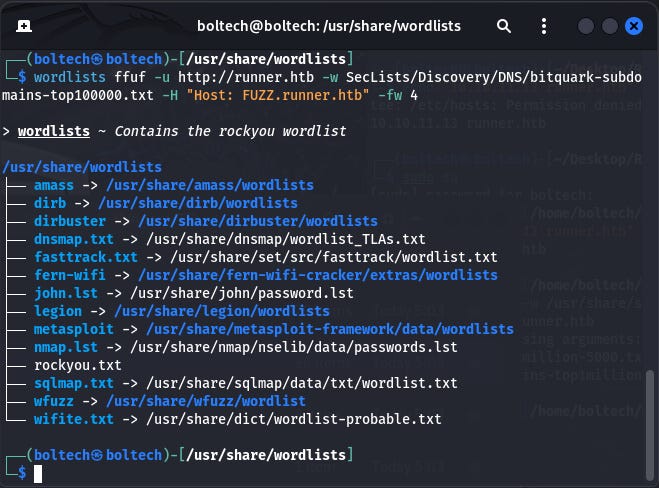
Also, I couldn’t find anything using virtual host blasting. Next, I tried a directory search to find valuable information that could be useful in hacking the machine, so I ran the following commands to search for other directories on the Runner machine.
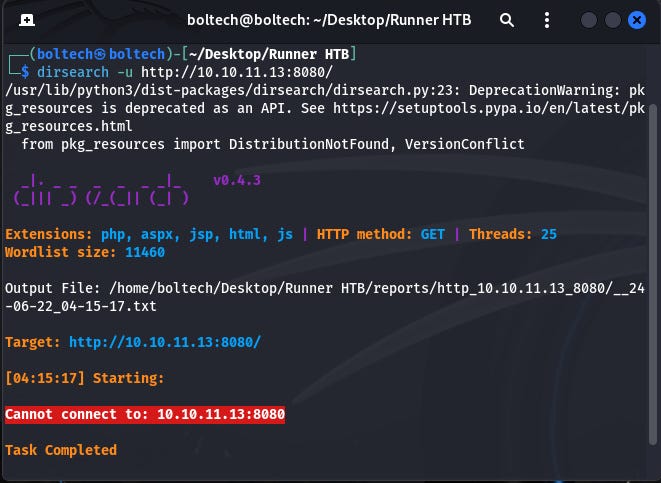
Also, I couldn’t find any useful information or directories that could help me to solve this machine. This was getting quite interesting!!!. The next method was using Gobuster to uncover hidden directories and files on the target machine.
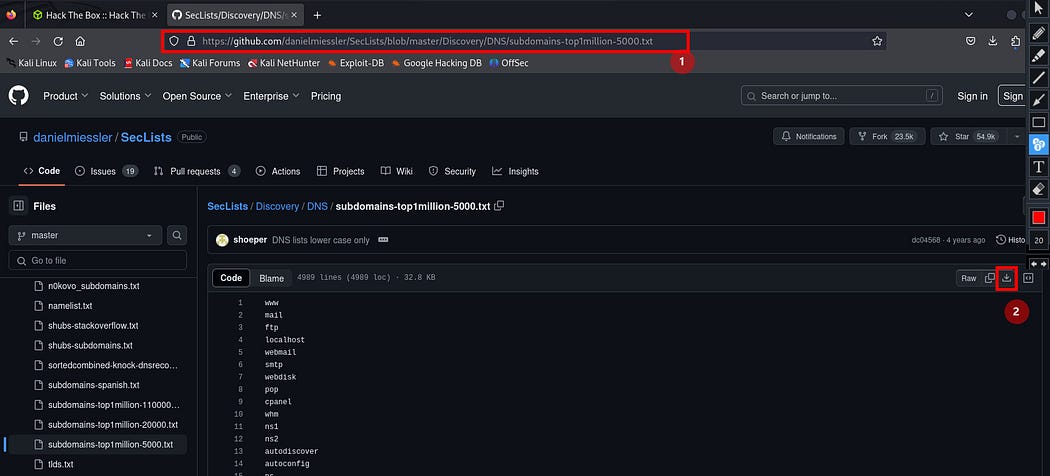
I downloaded the subdomains-top1million-5000.txt file from GitHub, then moved it into the directory in the following manner usr > share > seclists > discovery > DNS (Note: You must create this directories yourself or point directly to the part where you've downloaded it) and run it together with the gobuster tool by also specifying the URL of the target machine/IP address.
If this shows an error that the wordlist top1million-5000.txt file cannot be found, search for seclists/Discovery/DNS/subdomains-top1million-5000.txt on GitHub and download it. Tip: If it returns an error that the path does not exist, right click on the txt file, copy and paste it directly in your terminal. This will point directly to the location of the file on your machine.
Once the file has been downloaded, I navigated to /usr/share directory and create the following directory in this order seclists > Discovery > DNS and move the subdomains-top1million-5000.txt file into the DNS directory.
After this has been completed, I opened a new terminal without navigating into any directory and created a customize word list using cewl command and then used gobuster to find other url that are present on the host machine.
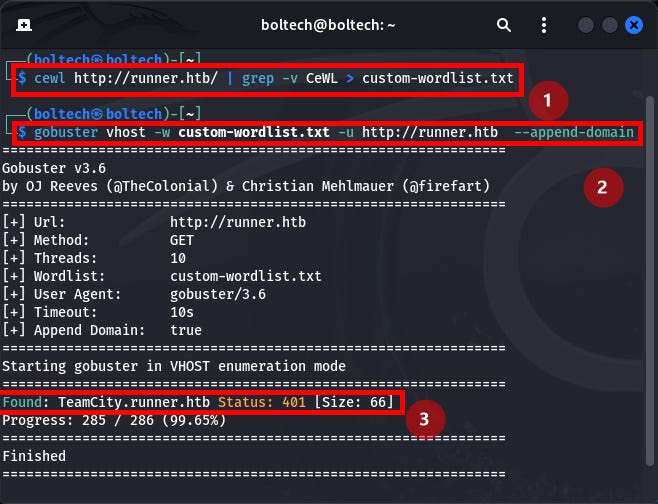
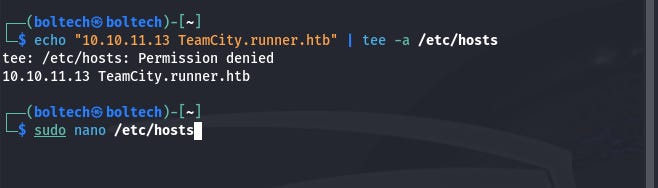
I found teamcity.runner.htb URL and I added this into my /etc/hosts file by running the following command in the terminal:
Alternatively, you can add this to the /etc/host file as a super user by running the following command:
or
(This opened the GNU command line interface and I added the IP address and the domain name I want it to redirect to)
Next, I opened the browser on my Kali Linux machine and visited http://teamcity.runner.htb/login.html
A login screen with a username and password text input field appeared. I noticed that below the login button, there’s a build version number 2023.05.3 (build 129390) of the Teamcity website. I tried to find the exploit for this version to see if I can bypass the login screen or a common/default username and password.
Luckily, I found a Remote Code Execution for this version on exploit database website and I downloaded the file.

This downloaded a python file (51884.py) and I copied this into my “Runner HTB” folder. After copying the file, I launched my terminal and ran the python file using the following command:
This displayed a username and password I can use to sign in into Teamcity website.
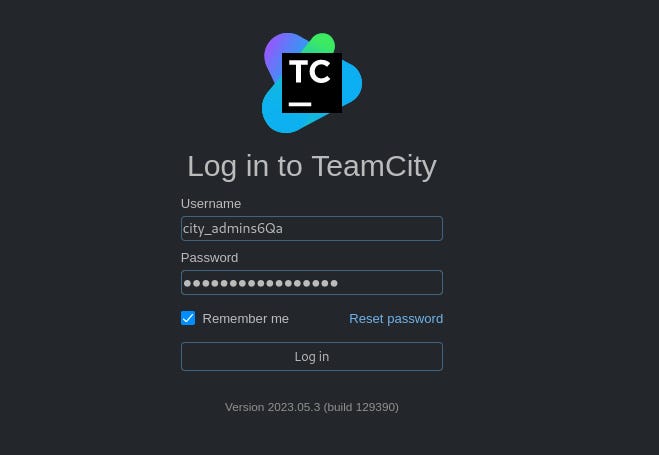
After I have successfully logged in, I navigated to “Administrator” at the upper right corner of the screen.
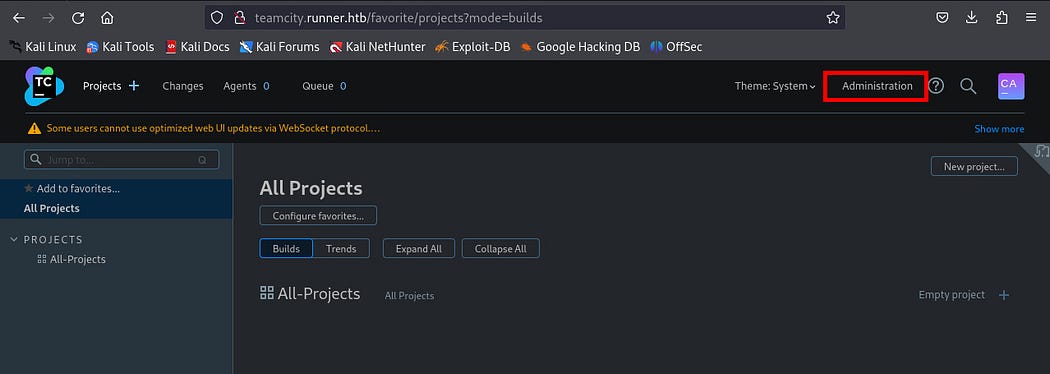
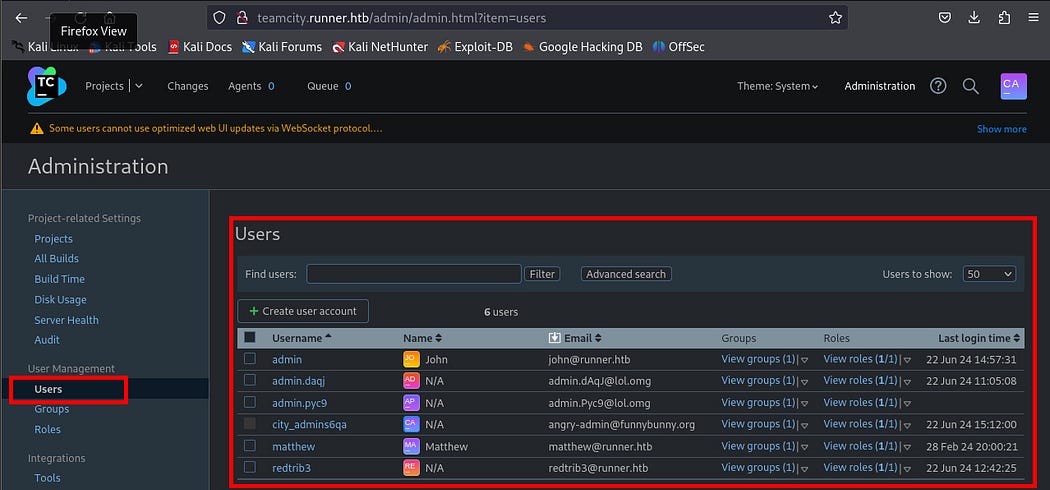
I navigated to “User” tabs and there I found multiple users, their email addresses and the roles associated with each one of them.
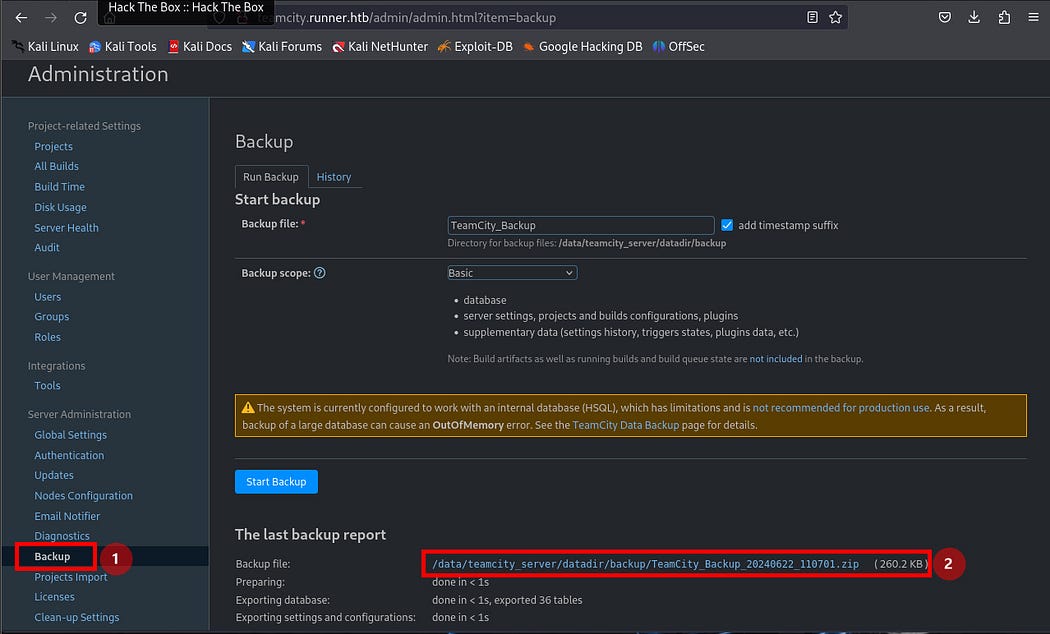
Next, I clicked the “backup” tab. I will hover over the blue link of “Backup file” and click on it. This will download the backup zip file.
I navigated to the folder where the file has been download and unzip it. In my own case, I moved the file into the “Runner HTB” folder on my desktop by running the following command while I am still in the folder “Runner HTB”
After moving the teamcity_backup zip folder into the Runner HTB runner, I unzipped the file using the following command:
Next, I performed enumeration using the following commands. While enumerating, I found out that there is an id_rsa file in the backup folder.
Alternatively, you can find the id_rsa file in
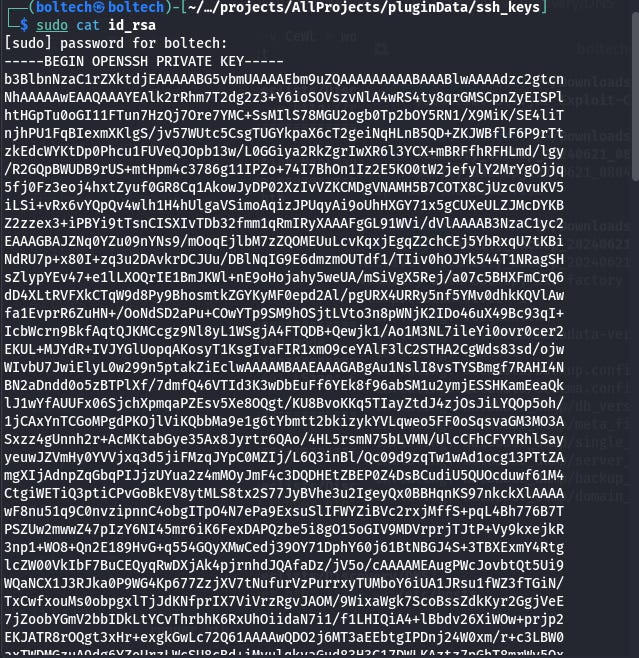
I navigated into the directory above and open the id_rsa file using the following command:
This opened the file id_rsa and it will displayed the content of the file. In the file, I found the OPENSSH Private Key and other hash values in the file.
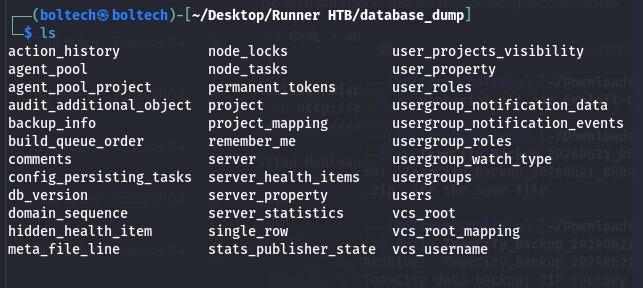
Afterwards, I navigated to the folder titled database_dump. Once I am inside the folder, I tried to find the file called users and open it using the following commands:
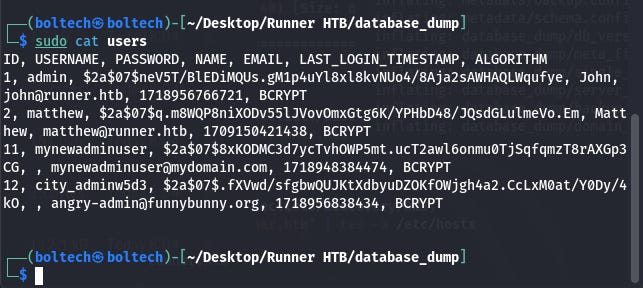
When I opened the file “users”, I found different usernames and passwords including last login timestamp, id, name and email address of each of the users.
Next, I tried to crack the id_rsa hash by using john the ripper hash crack command. To do this, I changed to super user by running this command in the terminal:
This changed the shell from boltech@kali to root@kali and I ran the following commands in the terminal:
Obtaining the user flag
After I obtained john@runner shell, I ran the ls command to list the files in the directory (shell) and I got the user.txt file which I read using the following command:

Here is the result of my readings. I got the user flag (hurry!!!)

Next, I looked for a way to obtain root flag. The first thing I did was to check the open ports by running the following command:
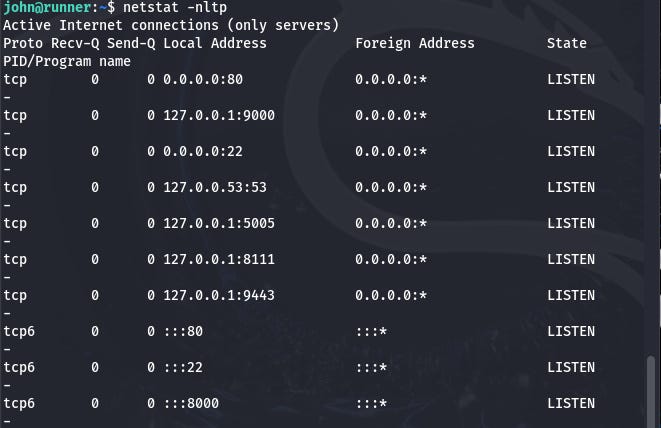
There seems to be something interesting at port 9000. So I forwarded it to myself by running the following command:
Next, I tried to crack the hash of either john or matthew by using john the ripper.
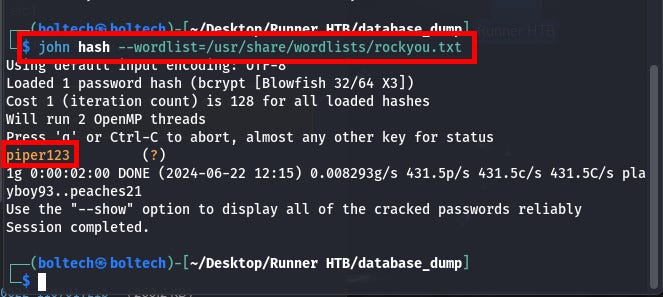
Firstly, I created a hash file inside the “database_dump” folder and I ran the following commands:
From the previous screen (image), you can see that I got piper123 as the password from the hash crack for user “Matthew”.
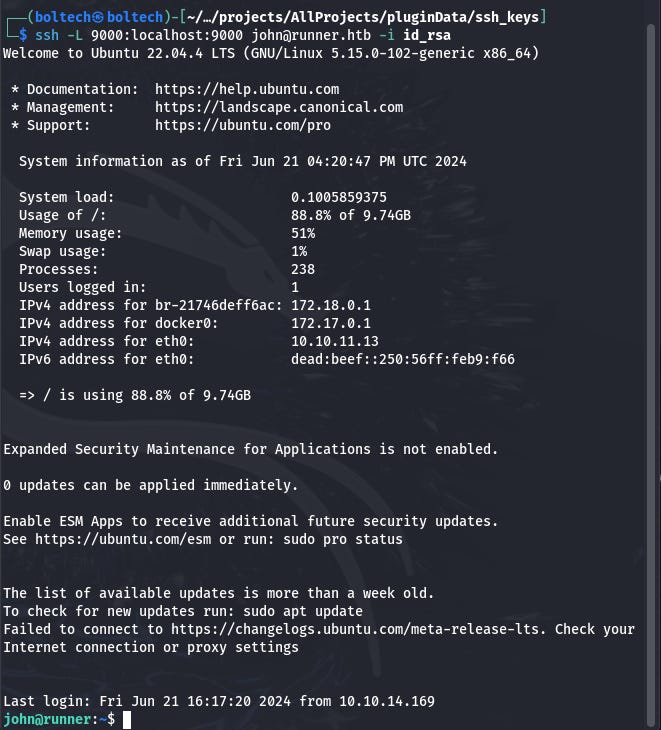
I performed privilege escalation. After some enumeration, I found some locally running ports. Next, I navigated to john root shell and ran the following command:
After running the command, I found some local ssh port forwarding for all open ports. The next thing I did was running the following commands:
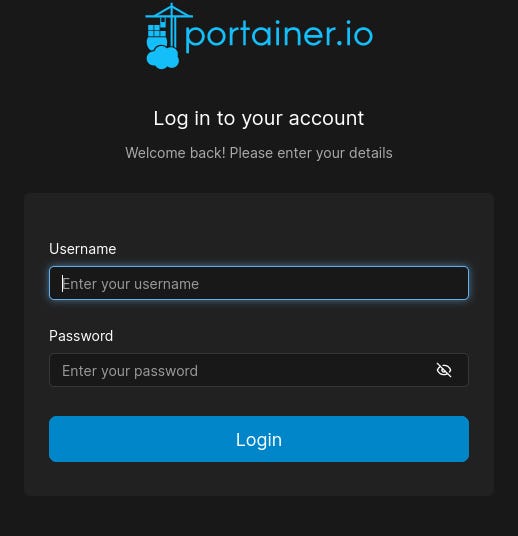
Afterwards, I navigated to portainer.io website by visiting http://127.0.0.1:9000/. This launched portainer website and a login screen is going to pop up. Portainer is a container management software that is use to deploy, troubleshoot, and secure applications across cloud, datacenter, and Industrial IoT use cases.
Now I used matthew’s login credentials to access the portainer website. You can recall that I logged into teamcity.runner.htb where I found different users, email addresses and password credentials.
Firstly, I needed to crack the hash to find the password of the username (john and matthew). The login credentials for portainer is:
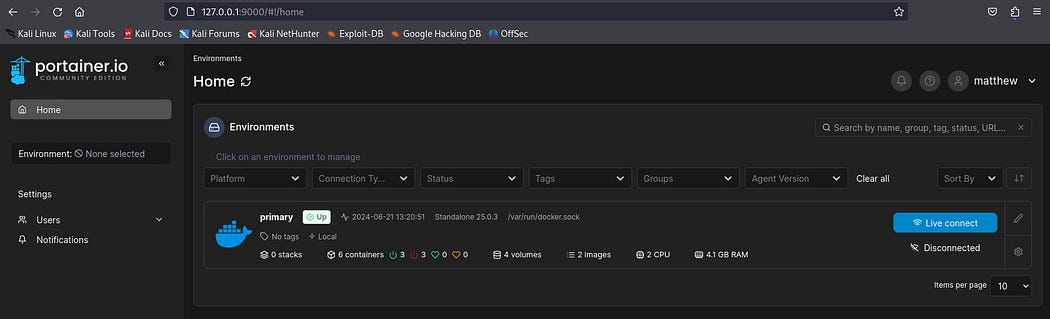
These credentials allowed me to sign in, and you can see that I am able to login into the account (from the screenshot below.)
I am on portainer.io platform, I clicked on the docker section located in the environment. Next, I navigated to “images” tab on the left hand side.
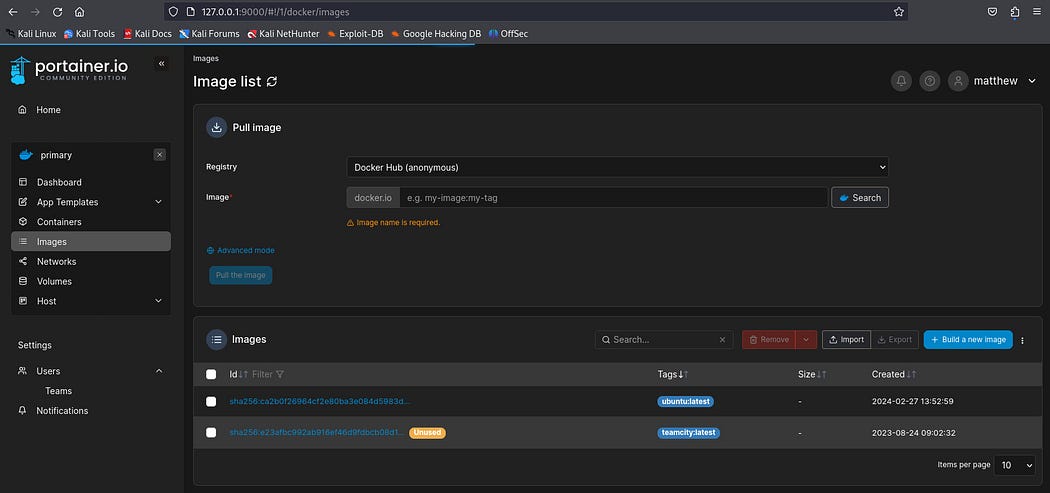
There are two docker images called ubuntu:latest and teamcity:latest
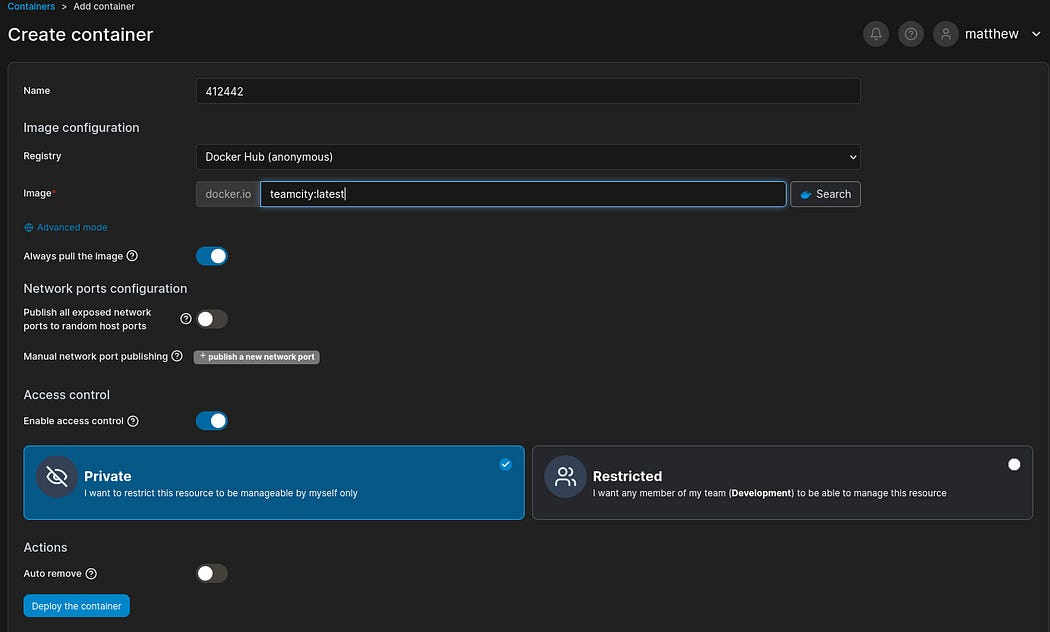
Next, I navigated into the container control panel by clicking on “container” and I clicked on “Add container” tab on the left hand side.
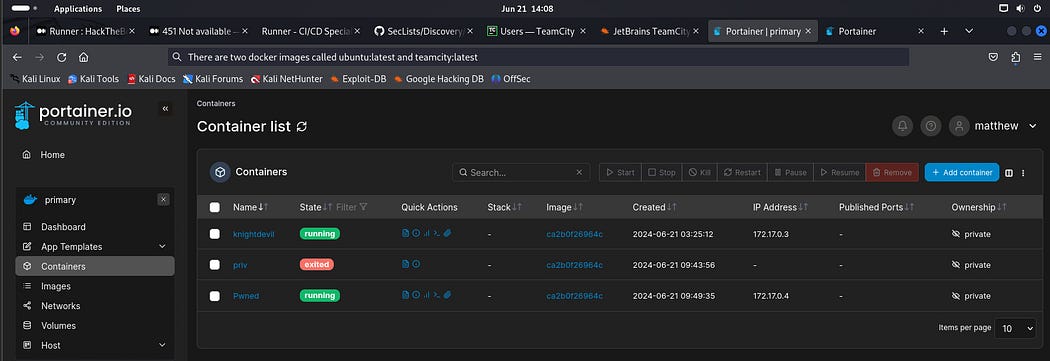
I set the following values: For the new container, I set the name to “412442”, image to “teamcity:latest” and I made sure the following options are true for “Always pull the image” & “Enable access control.” In the “advanced container settings”, I set the working dir to take the value:
Once I am done setting this, I clicked on the button “Deploy the container” to deploy the container.
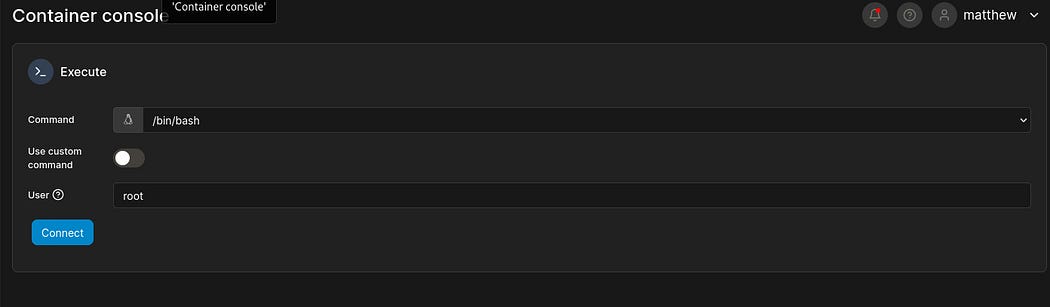
Next, I navigated to the container named “412422” and click on “console” this launched the container console and I typed “root” in the user text field and clicked on connect to launch the terminal.
Once my terminal has been successfully launched, I read my root flag by running the following commands:
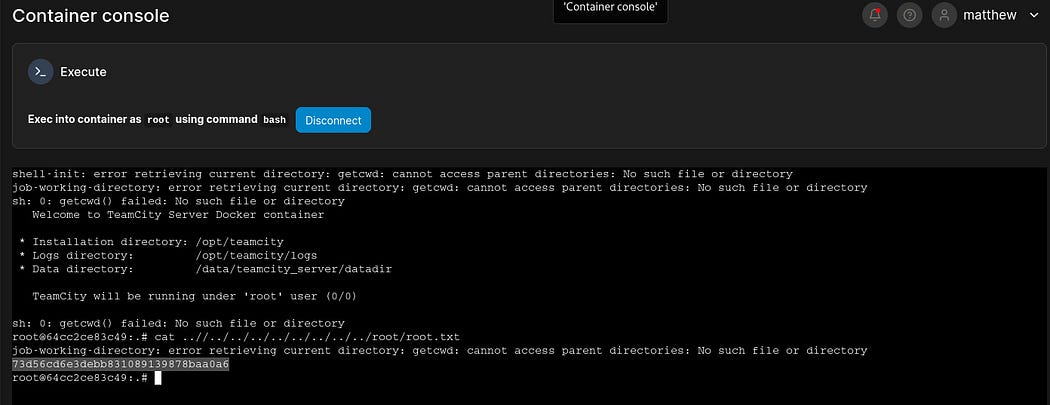
Hurry!!! I got our root flag

Congratulations if you made it this far. If you enjoy reading my writeups, kindly subscribe to my channel and follow me on my social media handles:
- YouTube channel: https://m.youtube.com/@BoltechTechnologies1
- LinkedIn https://www.linkedin.com/in/isiaq-ibrahim-468588156/
- Twitter at https://x.com/BoltechNG
- Follow me on Medium: https://medium.com/@ibrahimbolaji50.ib
This walkthrough was first published on Medium on June 25 2024. The walkthrough had 23 views and 9 reads on Medium and 489 views on YouTube.


Keywords:
DevHub htb walkthrough
DevHub htb writeup
devhub hack the box walkthrough
devhub hack the box write up
DevHub HackTheBox Season 11 htb walkthrough
HackTheBox | DevHub machine season 11 htb writeup
devhub.htb
I just solved DevHub from Hack the Box
Owned DevHub from Hack the Box
Pwned DevHub from Hack the Box
Rooted DevHub from Hack the Box
DevHub writeup
Hack The Box Writeups - The Ultimate HTB Resource
Reactor htb writeup
Reactor htb walkthrough
Reactor HackTheBox
Reactor Hack the Box Write Up
Reactor Hack the Box Walkthrough
HackTheBox reactor.htb
I just solved reactor from Hack the Box
reactor htb machine user flag season 11
reactor htb machine root flag season 11
Connected HTB Writeup
Connected HTB Walkthrough
SmartHire HackTheBox
SmartHire htb writeup
SmartHire htb walkthrough
SmartHire Hack the Box Write Up
SmartHire Hack the Box Walkthrough
smarthire - season 11 Hack the Box machine solution complete walkthrough
smarthire hack the box machine user flag
smarthire hack the box machine root flag
HackTheBox smarthire.htb
HackTheBox Connected Walkthrough
HackTheBox Connected Write Up
I just solved Connected from Hack the Box
connected.htb Season 11 HTB Complete Walkthrough Solution
Connected Hack the Box Writeup
Connected Hack the Box Walkthrough
Owned Connected from Hack the Box
Pwned Connected from Hack the Box
Rooted Connected from Hack the Box
Hack The Box Connected Season 11 HTB Machine tricks
Connected Writeup (HackTheBox Easy Machine)
HackTheBox - Connected
Connected hackthebox tutorial
Beginner’s Guide to Conquering Connected on Hack the Box
Connected-HTB-Machine GitHub
Hack The Box - HTB Connected Writeup - Easy - Weekly
Connected WriteUp - HackTheBox
HackTheBox | Connected [Easy] Full Walkthrough
Connected HTB - Complete Writeup
Connected machine htb walkthrough
Beginner’s Guide to Conquering DevHub on Hack the Box
comprehensive walkthroughs for Hack The Box machines, challenges, and certification prep
Mastering Interpreter HTB: A Step-by-Step Walkthrough
Interpreter HTB - HackTheBox Walkthrough
Hack The Box PingPong walkthrough
Helix htb writeup
Helix htb walkthrough
Helix Hack the Box Write Up
Helix Hack the Box Walkthrough
helix HackTheBox Season 11 machine walkthrough
Helix htb machine user flag
Helix htb machine root flag
HackTheBox | Helix machine complete solution write up
I just solved Helix from Hack the Box
Rooted Helix from Hack the Box
Owned Helix from Hack the Box
Pwned Helix from Hack the Box
MSSQL abuse
pingpong htb
HackTheBox DevHub (Medium/Linux
MCP Inspector OAuth
Jupyter Notebook WebSocket
Beginner’s Guide to Conquering Checkpoint on Hack the Box
HTB Facts Writeup
HTB Connected Machine: Season 11 Box
VariaType HTB writeup
#Connected #HTB #S11 (Linux Easy) 3rd box from HTB Season 11
Hack The Box - HTB Reactor Writeup - Easy - Weekly
Connected | Season 11 machine htb walkthrough
CVE-2025-66034
silentium htb writeup
silentium htb walkthrough
silentium hack the box write up
silentium hack the box walkthrough
Silentium HackTheBox
silentium.htb
I just solved Silentium from Hack the Box
Silentium htb machine user flag
Silentium htb machine root flag
HackTheBox | Garfield Season 10 machine complete walkthrough
garfield htb writeup
garfield htb walkthrough
garfield hack the box write up
garfield hack the box walkthrough
Garfield HackTheBox
garfield.htb
Garfield htb machine user flag
Garfield htb machine root flag
I just solved Garfield from Hack the Box
Owned Garfield from Hack the Box
Rooted Garfield from Hack the Box
DevArea htb writeup
devarea htb walkthrough
devarea hack the box write up
devarea hack the box walkthrough
DevArea HackTheBox
devarea.htb
I just solved DevArea from Hack the Box
HackTheBox | DevArea Season 10 machine complete walkthrough
DevArea htb machine root flag
DevArea htb machine user flag
kobold htb writeup
kobold htb walkthrough
kobold hack the box write up
kobold hack the box walkthrough
Kobold HackTheBox
kobold.htb
I just solved Kobold from Hack the Box
kobold htb machine user flag
kobold htb machine root flag
CCTV htb writeup
cctv htb walkthrough
cctv hack the box write up
cctv hack the box walkthrough
CCTV HackTheBox
cctv.htb
I just solved CCTV from Hack the Box
cctv htb machine user flag
cctv hack the box machine root flag
pirate htb writeup
pirate htb walkthrough
Pirate hack the box write up
pirate hack the box walkthrough
Pirate HackTheBox
pirate.htb
I just solved Pirate from Hack the Box
HackTheBox | Pirate Season 10 HTB Machine Complete Walkthrough
pirate htb machine user flag
pirate hack the box machine root flag
wingdata htb writeup
wingdata htb walkthrough
wingdata hack the box write up
silentium hack the box walkthrough
WingData HackTheBox
wingdata.htb
I just solved WingData from Hack the Box
rooted wingdata from hack the box
pwned wingdata from hack the box
wingdata htb machine user flag
wingdata htb machine root flag
pingpong htb writeup
pingpong htb walkthrough
pingpong hack the box write up
pingpong hack the box walkthrough
PingPong HackTheBox
pingpong.htb
ping.htb pong.htb
I just solved PingPong from Hack the Box
Rooted PingPing on Hack the Box
pingpong htb machine user flag
pingpong htb machine root flag
HackTheBox | Logging Season 10 htb complete machine walkthrough
logging htb writeup
logging htb walkthrough
logging hack the box write up
logging hack the box walkthrough
Logging HackTheBox
logging.htb
I just solved Logging from Hack the Box
logging htb machine user flag
logging htb machine root flag
HackTheBox | Eloquia htb machine complete walkthrough
eloquia htb writeup
eloquia htb walkthrough
eloquia hack the box write up
eloquia hack the box walkthrough
Eloquia HackTheBox
eloquia.htb
I just solved Eloquia from Hack the Box
eloquia htb machine user flag
eloquia htb machine root flag
HackTheBox | Hercules htb machine complete walkthrough
hercules htb writeup
hercules htb walkthrough
hercules hack the box write up
hercules hack the box walkthrough
Hercules HackTheBox
hercules.htb
I just solved Hercules from Hack the Box
hercules htb machine user flag
hercules htb machine root flag
HackTheBox | Fries htb machine complete walkthrough
fries htb writeup
fries htb walkthrough
fries hack the box write up
fries hack the box walkthrough
Fries HackTheBox
fries.htb
I just solved Fries from Hack the Box
HackTheBox | NanoCorp htb machine season 10 complete writeup
nanocorp htb writeup
nanocorp htb walkthrough
nanocorp hack the box write up
nanocorp hack the box walkthrough
NanoCorp HackTheBox
nanocorp.htb
I just solved NanoCorp from Hack the Box
nanocorp htb user flag
nanocorp htb root flag
HackTheBox | Cobblestone Insane htb machine season 10 complete writeup
cobblestone htb writeup
cobblestone htb walkthrough
cobblestone hack the box write up
cobblestone hack the box walkthrough
Cobblestone HackTheBox
cobblestone.htb
I just solved Cobblestone from Hack the Box
cobblestone htb machine user flag
cobblestone htb machine root flag


0 Comments